Display Suite and the Asset Module
I recently started a job that relies on Features, Display Suite, and the Asset Module. These things are great, these things are good. BUT! Sometimes it’s not entirely clear how to get something done with these in combination.
Features is not really the curveball in this equation, so I’m not going to focus on that at all. Features is pretty straightforward. The combination of the Asset module and Display Suite can be odd though, so that’s what I’m covering here.
In particular I’d like to discuss making changes to how the Asset module puts together the text for a link via text filters.
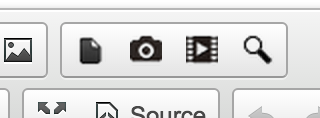
If you’re unfamiliar with the Asset module it puts in some damn fine little buttons to CKEditor to put an asset link (or image, video, etc) into the content you’re adding. It does this by placing a tag in the HTML, then the module itself replaces that tag with markup via a view() call.

So here is how those buttons work. First thing is they put in a tag of some sort. If you put in an image, for example, it’ll put this kind of tag into the HTML of the content you’re editing
[[asset:image:42 {"mode":"thumbnail","align":"left","field_asset_image_copyright":[],"field_asset_image_description":[],"field_asset_image_caption":[]}]]So when a page is rendered Asset module has a hook to look for tags, and do some search and replace kind of stuff. This is where hook_filter_info() comes in. If you grab the Asset module you can see what they did in the .module file. Generally hook_filter_info() will look something like this:
<?php
/**
 * Implements hook_filter_info().
 */
function example_filter_info() {

  $filters['example_filter'] = array(
    'title' => t('Example'),
    'description' => t('This filter will convert [example][/example] tags into markup'),
    'process callback' => '_example_filter_process',
    'cache' => FALSE,
  );

  return $filters;
}
?>
Looking at that function you may notice the callback. Well the callback is what will sweep through the tag as you define, and then pull things out. Think of the tag as the bookends, or container (both ways work) for the filter to look between to perform logic. Personally I prefer the bookend approach. Asset prefers the container approach. Again: both ways work, it doesn’t really matter. Here is a simple example of how the callback would work:
<?php
/**
 * Helper function for example_filter_info
 */
function _example_filter_process($text, $filter) {

  $regex_pattern = "/(\[example\])(.*?)(\[\/example\])/";
  if (preg_match($regex_pattern, $text, $matches)) {
    /** logic goes here.  Whatever was between your tags is now available for logic **/
  }

  return $something;
}
?>
Asset takes all of this a few steps further, and you can do a lot of things with filters, they’re powerful and I recommend their use. Asset, however, parses out what entity they need to load, and then they load it. In particular Asset caused me a very interesting problem with the way they do this. Asset used a view mode to render the entity and with Display Suite running I had a little trouble nailing down what I had to do. My lack of experience with Display Suite probably contributed to my confusion, but alas I’ve worked it out. Now I blog about it so I can remember what I did.
In this case what I wanted to do was change title of an entity in the markup if an alternate title view was selected for that use of the entity. So if you have one PDF you want to share, but you want to call it The Example in one instance an only Example in another instance. In the WYSIWYG all you get is the tag labeling the instance, and the view mode. In the Asset function to perform logic on the parsed data it combines the link and title directly, so outside of creating a new kind of tag and repeating Asset’s logic I didn’t see how to interrupt that to swap the titles…but I get ahead of myself.
First thing I needed to do was create a field on the Asset type to keep track of the alternate title. In this case there is only ONE alternate title, however if we were willing to allow for tag edits in the WYSIWYG we could probably allow any number. For how to create a field look to my previous post here, just keep in mind the entity is an asset, not a node.
After creating a field we need a new view! We do this the old fashioned way with hook_entity_info_alter(). You can do this in a new module, or in one you have out there already if that makes sense. Here is an example of that:
<?php
/**
 * Implements hook_entity_info_alter().
 */
function example_entity_info_alter(&$entity_info) {
  $entity_info['asset']['view modes']['alternate'] = array(
    'label' => 'Alternate Title',
    'custom settings' => TRUE,
  );
}
?>
After a quick cache clear you’ll see your new view show up under Structure>Asset types>Document>Manage display.

Here you can set what fields show up, etc. In this case for a Document the document field itself is the link plus title we need to edit, so make sure that exists in the view. Choose a layout for Display Suite. It is important to note what layout you’re using, you’re going to need to override that. In this case I chose the One column layout. Upon selecting your layout Display Suite provides the path to the default template for that. Basically what you can do is copy/paste that default template (in this case ds-1col–asset.tpl.php, the path is listed on the page) to a new tpl file you’ll create, then make your edits.
Before making the tpl file you need to make use of hook_theme_registry_alter() to announce your tpl file to drupal.
<?php

/**
 * Implements hook_theme_registry_alter().
 */
function example_theme_registry_alter(&$theme_registry) {
  // Defined path to the current module.
  $module_path = drupal_get_path('module', 'example');
  // Find all .tpl.php files in this module's folder recursively.
  $template_file_objects = drupal_find_theme_templates($theme_registry, '.tpl.php', $module_path);
  // Iterate through all found template file objects.
  foreach ($template_file_objects as $key => $template_file_object) {
      // If the template has not already been overridden by a theme.
      if (!isset($theme_registry[$key]['theme path']) || !preg_match('#/themes/#', $theme_registry[$key]['theme path'])) {
          // Alter the theme path and template elements.
          $theme_registry[$key]['theme path'] = $module_path;
          $theme_registry[$key] = array_merge($theme_registry[$key], $template_file_object);
          $theme_registry[$key]['type'] = 'module';
      }
  }
}
?>
Now create a theme folder in your module, or just create your ds-1col-example-asset-alternateive.tpl.php file anywhere, your previous hook will search your module directory recursively.
Our final step is to create the tpl, copy the contents from the original ds-1col tpl file to our new tpl file, and then make our edit. To swap out the title I’m first checking to see if the alternate view mode is selected, then if an alternate title exists for the asset swap the title on the ds_content which get’s passed around.
<?php

/**
 * @file
 * Display Suite 1 column template.
 */
?>
<<?php print $ds_content_wrapper; print $layout_attributes; ?> class="ds-1col <?php print $classes;?> clearfix">

  <?php if (isset($title_suffix['contextual_links'])): ?>
  <?php print render($title_suffix['contextual_links']); ?>
  <?php endif; ?>

  <?php if($asset->asset_options['mode'] == 'alternate'): ?>
  <?php
  $title = $asset->title;
  $alt_title = $asset->field_alt_title['und'][0]['value'];

  if(!empty($alt_title)) {
    $ds_content = str_replace($title, $alt_title, $ds_content);
  }
  ?>
  <?php endif;?>

  <?php print $ds_content; ?>
</<?php print $ds_content_wrapper ?>>

<?php if (!empty($drupal_render_children)): ?>
  <?php print $drupal_render_children ?>
<?php endif; ?>
And that’s it! clear some caches, enable your module if you haven’t already, and you’ll see that your title will change on your Asset Document when you use the tag in content.
UPDATE Ok so there is one last little thing you need to do that I forgot to mention and it just cost me like 3 hours because I’m an idiot. You need to go to Structure>Asset types»Document>Manage display.WYSIWYG MODES and then check the box next to your new view mode, then save. That’s it!